1. Send to QRZ
The program can export saved logs directly to the QRZ.com database.
To make this possible, the user must have a subscription and generate an API key on the QRZ website. We enter the API in the LogBook configuration.
After clicking Send to QRZ, the following window will appear:
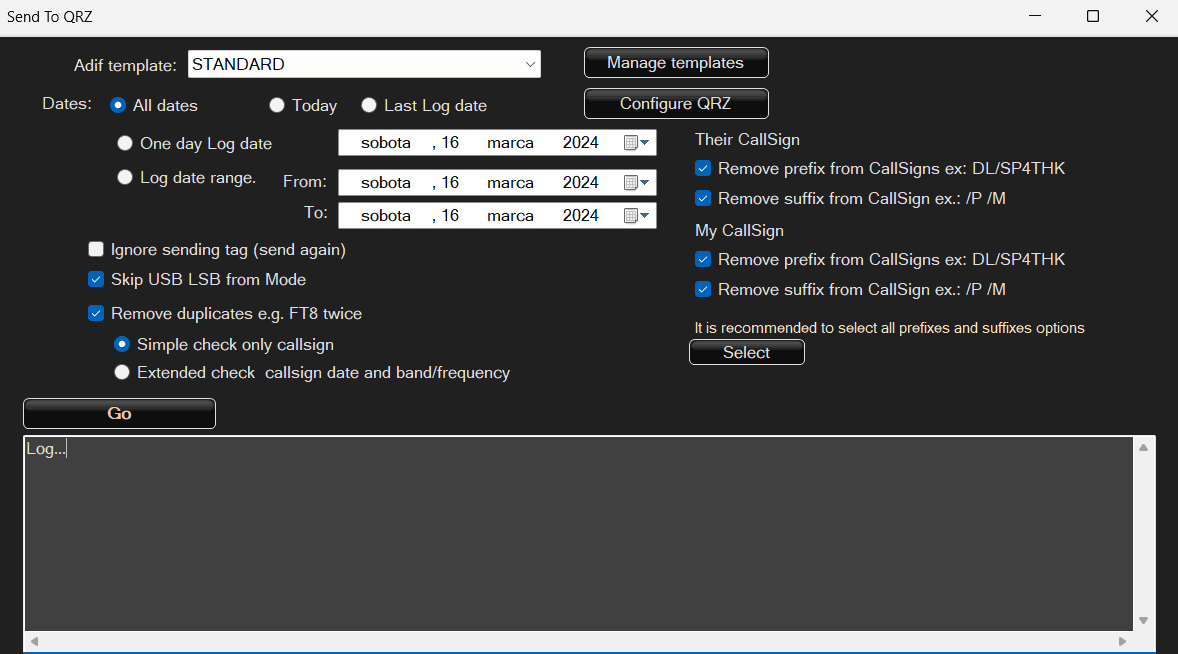
At the beginning, you can choose the adif template, but the program will suggest the STANDARD template. These are the same templates for exporting the log to .adi files.
The program saves what QSOs were sent and does not have to send them again. Unless the user requests it.
Then select a date range.
During normal operation, you can safely select the everything option. In the next option, Ignore sending marker, we set whether to send new QSOs, i.e. those that have not yet been sent to QRZ, or all of them. We usually leave it unchecked.
The next option, Remove USB LSB, is basically irrelevant in QRZ, but I recommend selecting it. Instead of SSB USB or SSB LSB mode, only SSB will be sent.
Remove duplicates removes repeated saved QSOs. The frequency, band and date are checked and only when all these data match is the record marked as a duplicate and not sent. Duplicates are not removed from the log, only from the shipping list.
Removing prefixes and suffixes.
QRZ distinguishes CallSign with prefixes and suffixes SP4THK is a different sign than SP4THK/P. If the user wants to work with multiple characters, it must be configured appropriately in QRZ.
The safe option is to select all 4 options. The remaining configuration is for people who have configured it appropriately.
Click Start and the sending begins.
When sending, the program will inform you whether the data has been sent and saved or omitted and for what reason, e.g. if they are already in the QRZ database.
2. Send to LoTW
The program can also send logs to LoTW. This requires installing and configuring the TQSL program from the LoTW program page. Installation and configuration are described on the program’s website and widely on the Internet. After selecting the option, a window will appear:
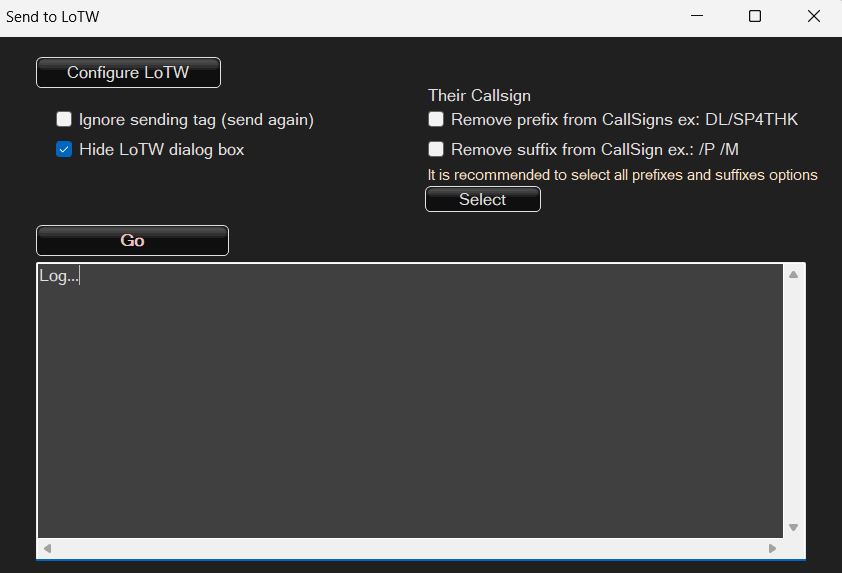
You can configure LoTW options in the LogBook configuration window. Then we click start and the data is sent. Removing prefixes has a similar meaning as with QRZ.
3. Sending QSL by email
The program also has a cool function – you can “design” your own QSL card and send the cards to your interlocutors, provided that they provided their e-mail addresses either during the conversation and they were saved or are available in the QRZ database.
After clicking send by email, the following window will appear:
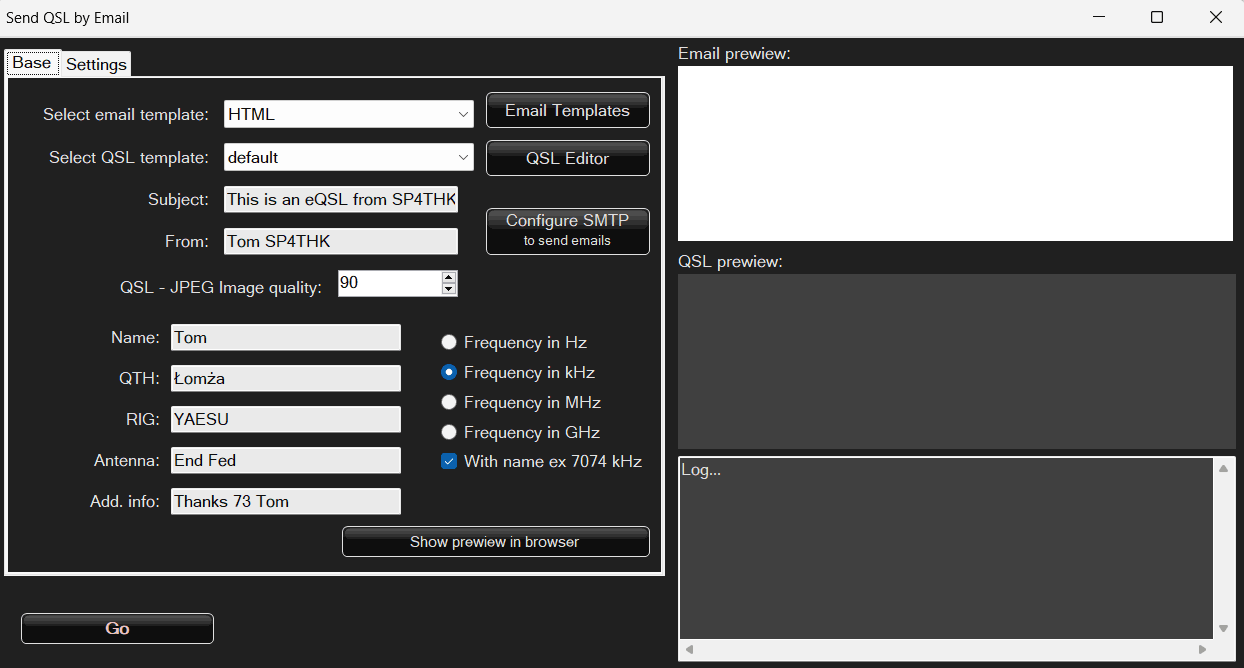
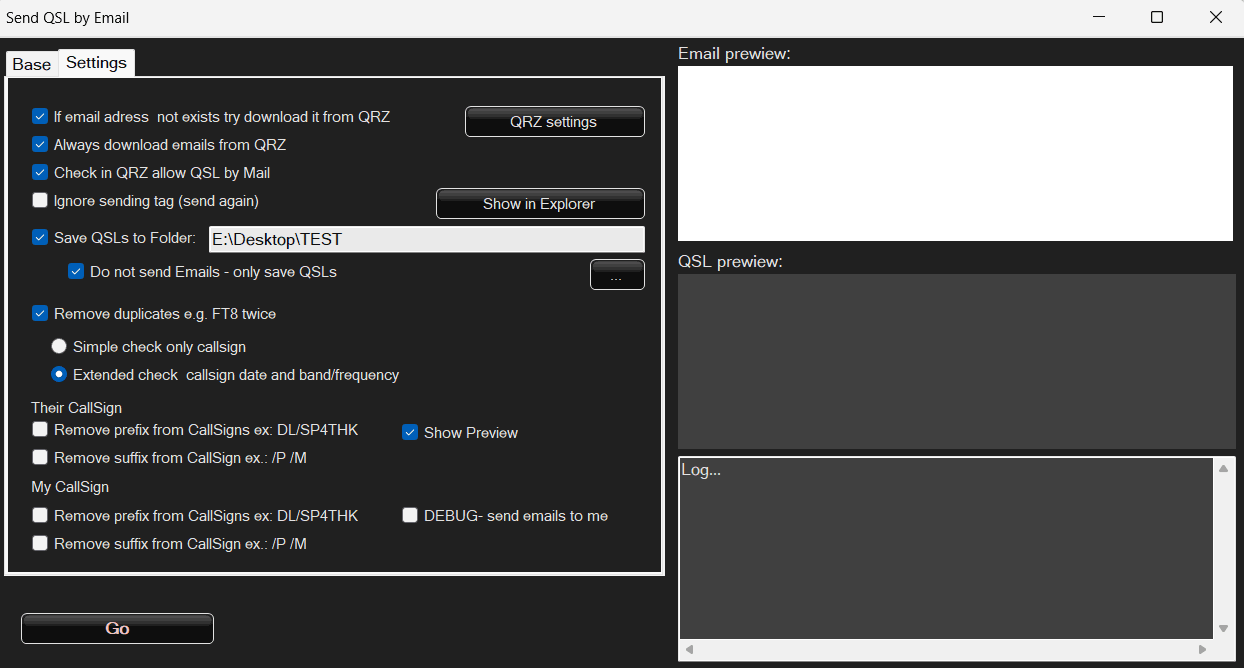
The email message consists of two templates. Email template and QSL card template.
a) Email templates
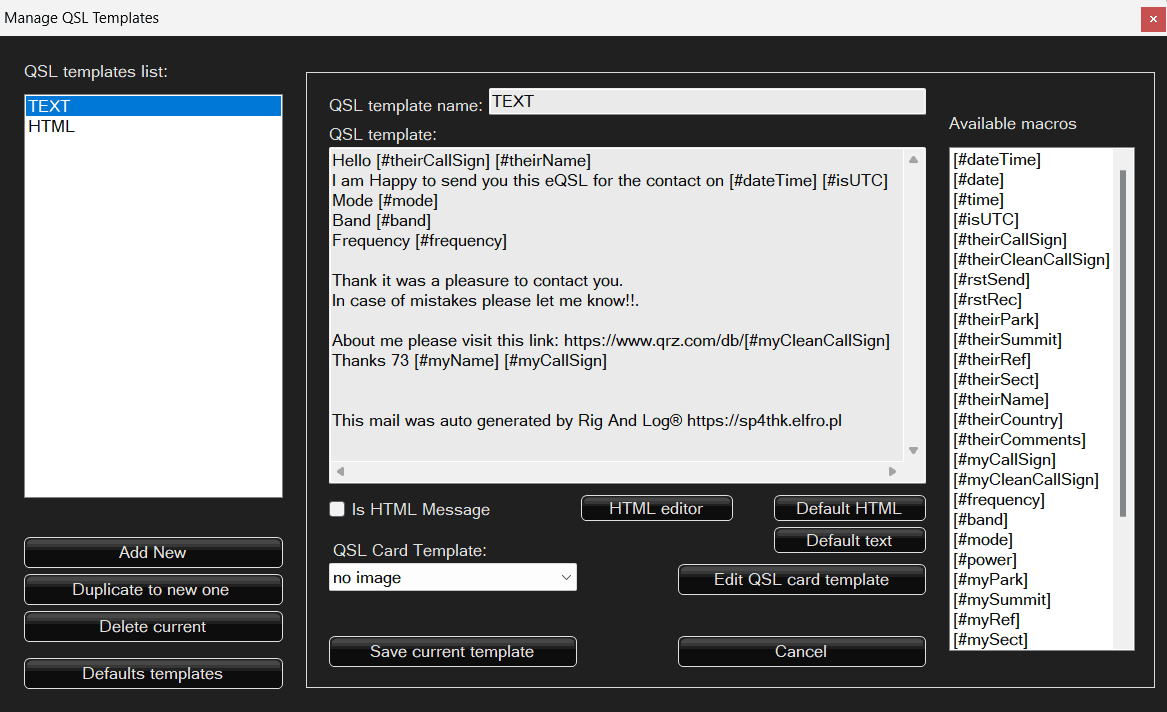
We have two default templates: TEXT and HTML. We can edit, delete and add our own. On the right is a list of macros. You can also select a QSL card template. This is the suggested default value for the template which can be changed in the main program window before sending the e-mail.
The message can be edited in the external attached editor run in the browser – Tiny MCE – Click on HTML Editor.
b) QSL editor
Here we manage QSL card templates. After running it, the QSL card editing window will appear. The photo shows the already completed card design:
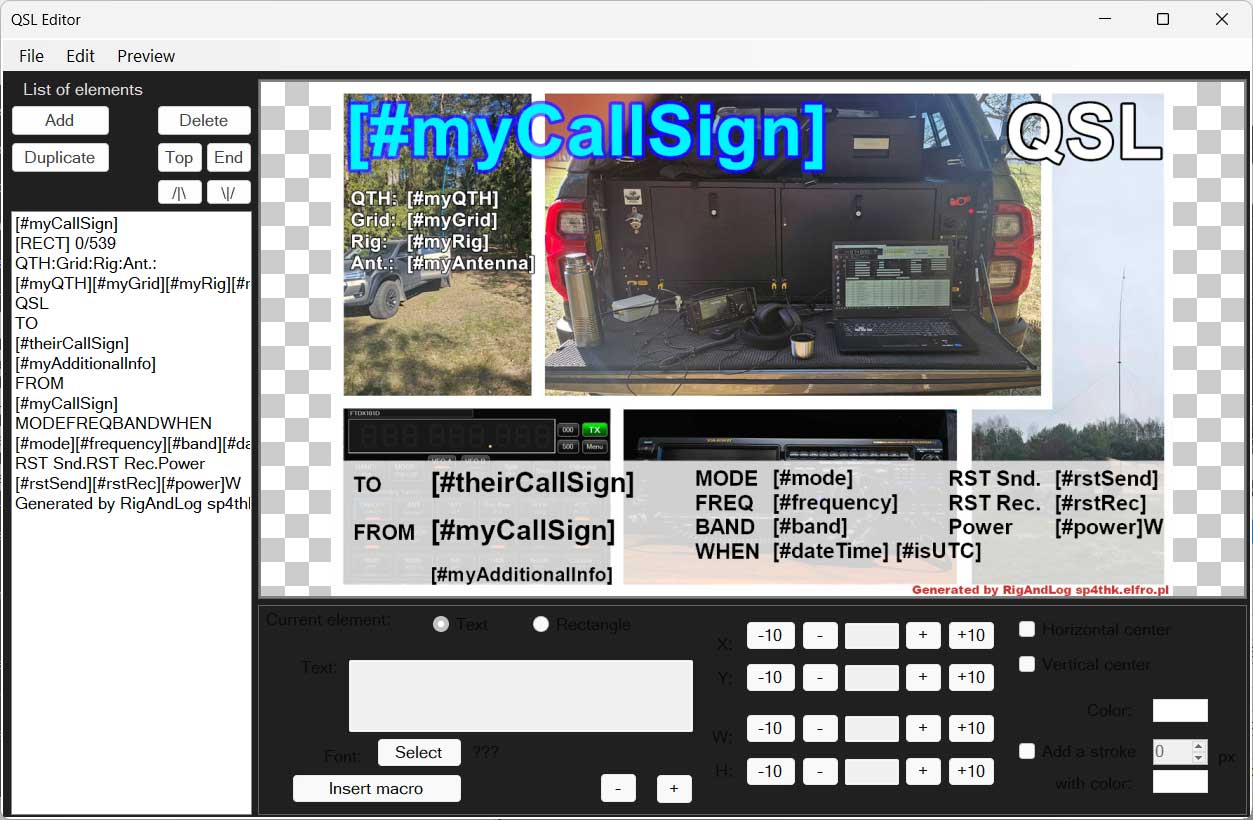
The program has a fairly simple editor implemented.
First, open one of the sample templates or create a new template,
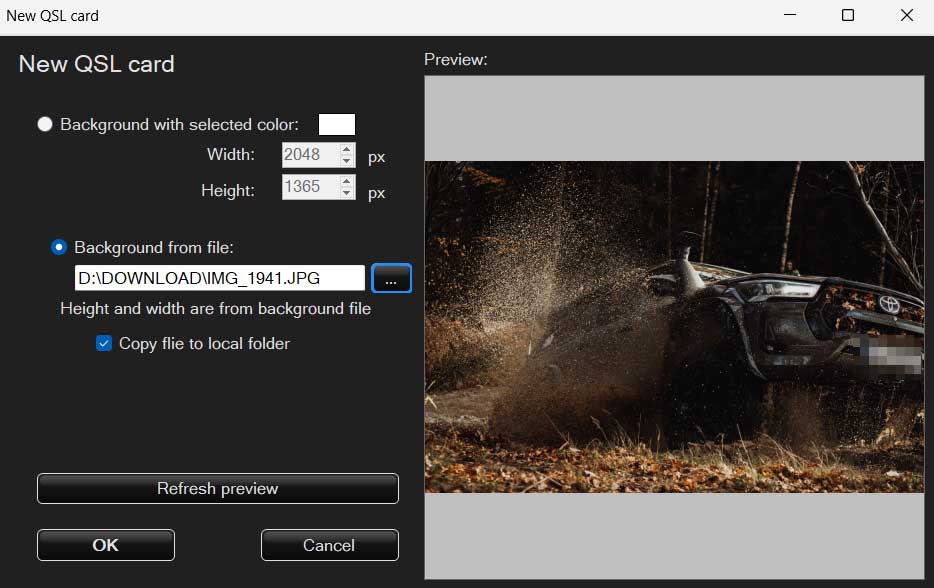
There are two options. Solid color or we choose a background made in another graphics program.
I recommend selecting the copy file to local folder option. Thanks to this, when moving or copying the program anywhere, we will save all the data.
You can add elements one by one to the opened file. It can be text or a rectangle of any color with transparency. You can click on objects and move them. But if we load a huge background, it may work very slowly, especially on weak computers. The purpose of the program was not to write an advanced graphical editor.
After defining the QSL, we can preview it by clicking Preview. Macros will be filled with the first record from the database or default data.
Examples of default QSL cards:
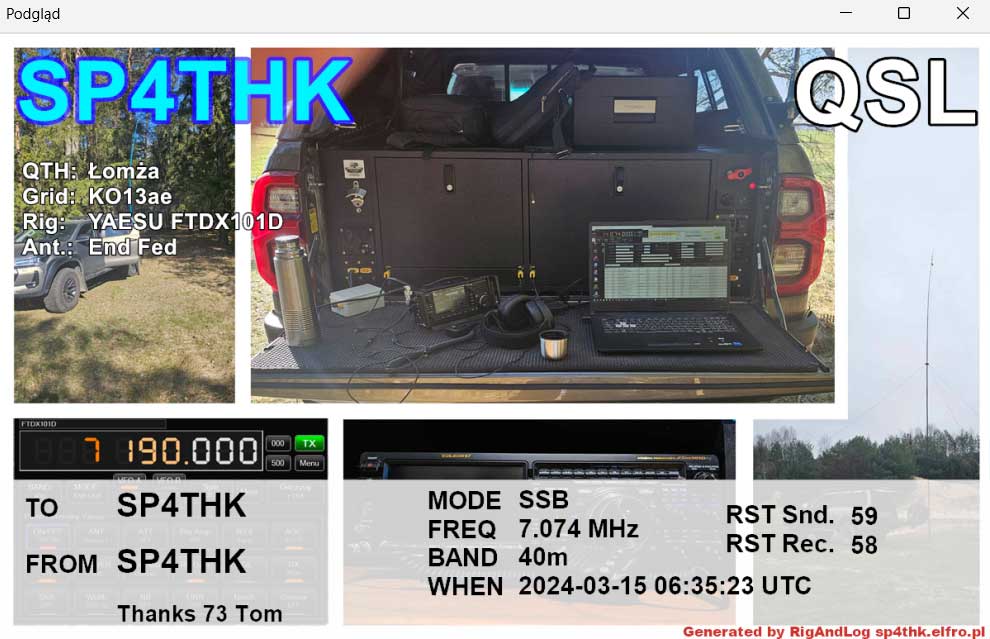
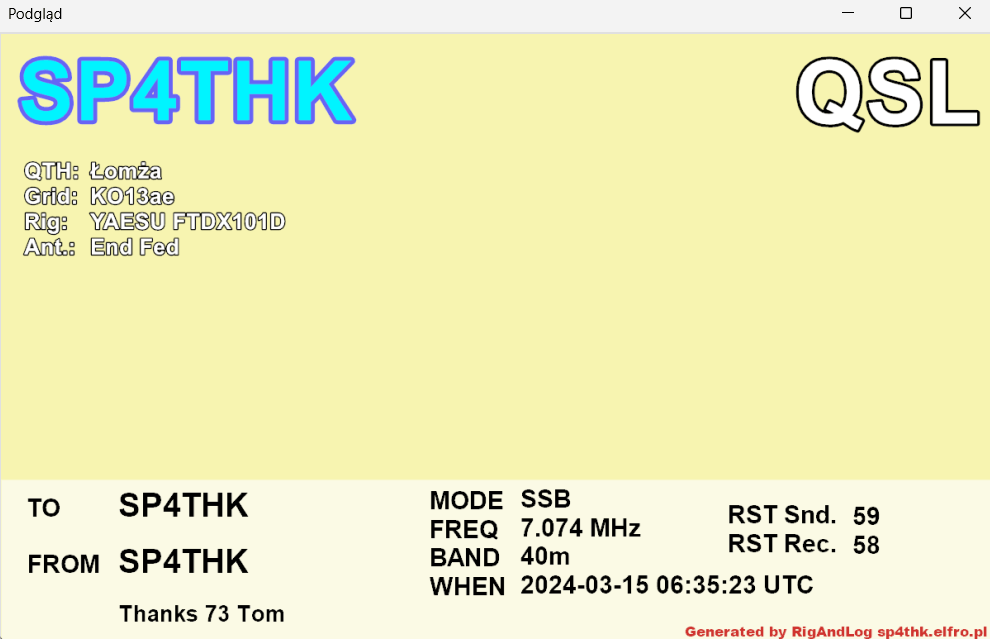

If you have a cool project and want to include it as one of the default ones, please contact me: Contact
c) SMTP configuration
E-mails are sent using the SMTP protocol, which is a very popular protocol used by many mail servers. Check the exact configuration and parameters with your postal provider.
After clicking Configure SMTP, the following window will appear:
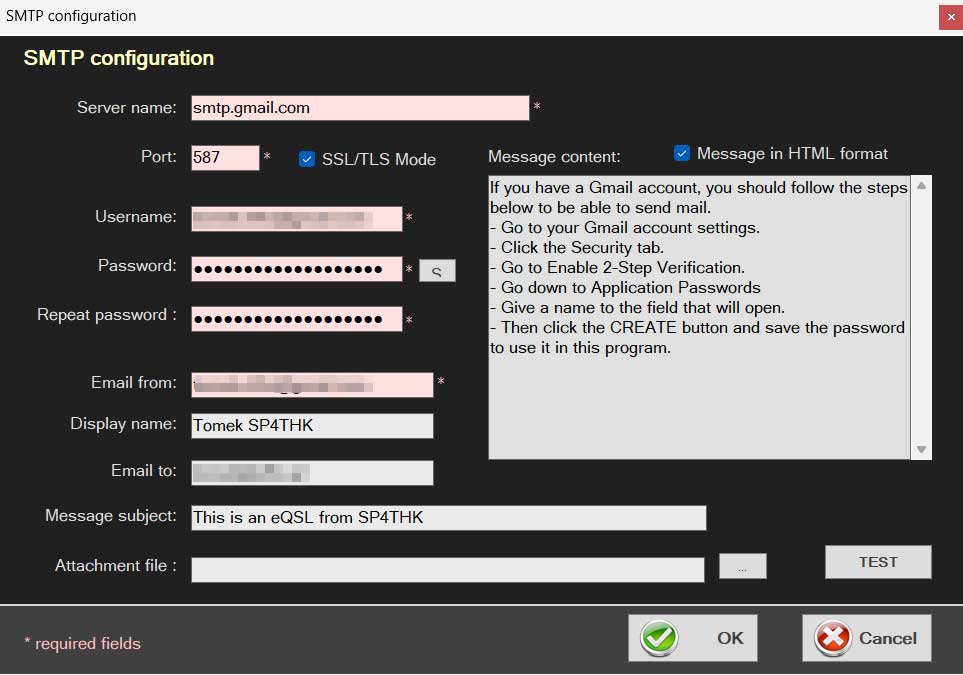
As I have already mentioned, you need to set the parameters in accordance with the settings from the supplier.
Not every provider provides SMTP for their email or requires an additional fee for it. Additional configuration in email settings is often required.
This is the case in Gmail, for example. By default, gmail does not allow “foreign” applications to send via SMTP, but you can change this:
To do this, log in to your Google account and perform the following steps:
Log in to your account in a web browser.
Go to your Gmail account settings. Click on the icon with the initial or avatar at the top right and select Manage Google Account
Click the Security tab.
Go to Enable two-step verification or, if enabled, to Two-step verification
Once you’ve turned it on and entered Two-Step Verification, go to the bottom and select App Passwords
Give the highlighted Application Name field a name.
Then click the Create button and save/copy the generated password to use it in this program.
Required fields are highlighted in red. However, to perform the test, the program additionally needs the Email to and Message content fields.
The Message in html format check box is irrelevant – this value is replaced with the value from the template.
Fields not marked in red can be replaced with data from the main sending window, more on that in a moment.
After you have set up and tested your mailbox.

Next, you need to select an email template, which may immediately suggest which QSL template to use, but this can be changed. We select the title of the email being sent and the display name From: (from whom). Sometimes in some boxes the name from must be the sender’s (our) email address.
QSL – JPG image quality – the higher the value, the better the quality of the generated QSL, but it will take up more space.
Next, there are additional macro elements set only for QSL templates. They are not available in log, export or import.
Most of the next options are intuitive.
Show preview has two display modes depending on whether QSL recording to a folder is selected or not.
The DEBUG option will send all emails to us regardless of whether and what address the user has. This allows you to test what is actually being sent.
Click on Start and the sending begins…
And that would be it
END


